Categories
Masonry Services

8 Common Concrete Repair Mistakes and How to Avoid Them

Concrete is a highly robust material that forms the basis of numerous structures across the globe. Like any building material, concrete may form cracks, spalling and other indications of wear and wear and tear. If this occurs, prompt and correct concrete repair is vital to ensure the integrity of the structure and to prevent further damage.

But, DIY concrete repair attempts or hiring contractors with no experience could result in costly errors. In this article, we’ll look at eight common mistakes made in concrete repair and ways to avoid them, which will ensure the longevity of your repair and a successful outcome:

Ignoring the Root Cause of Damage

A lot of homeowners are quick to start repair of cracks without considering the root cause. Cracks may be caused by a variety of issues such as foundation shrinkage, settlement, or incorrect curing. In the absence of the cause, it leads to a temporary fix, but cracks could reappear.

How to Avoid It: Before you begin any concrete repair determine the cause of the problem. Contact a structural engineer to identify the issue and suggest suitable solutions. The root cause of the issue can be addressed to ensure an effective fix that will strengthen the whole structure.

Inadequate Surface Preparation

Filling in cracks isn’t enough. The most important step in concrete repair is to properly prepare the surface. This means removing any dirt, loose debris and patching materials that are already in place. Also, you can make use of an electric or a scarifies to roughen up the surface, giving a better bond to the patch material.

How to Avoid It: Make sure to thoroughly clean the area using water and a hard brush. For grease or oil staining you should use degreasers created for concrete. The surface should be textured to the depth of one-quarter millimeter together with an electric brush or grinder or scarifier. This will create a smooth surface which enables the material used to repair it mechanically join with the concrete.
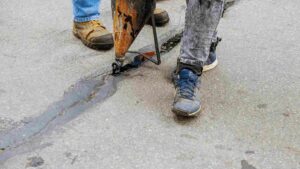
Common Concrete Repair Mistakes and How to Avoid Them

Using the Wrong Repair Material

There is no universal solution to concrete repair. Different kinds of damage require different repairs materials. A material that is not appropriate for repair can cause the patch to become weaker and could cause premature failure.

How to Avoid It: Find out about different repair options such as epoxy grouts, hydraulic cements or polymers. Select a product depending on the depth, size, and the location of the crack in addition to the weather conditions. ForĀ surface cracks that aren’t too severe simply patching the crack could be sufficient. For structural cracks that are more extensive grout with a high strength could be required. A consultation with an skillful can benefit you choose the best material for the task.

Improper Mixing and Application

Concrete repair products are typically provided in specific ratios of mixing as well as instructions for application. Abiding by these directions could affect the strength and adhesiveness that the patches provide.

How to Avoid It: Always follow the manufacturer’s guidelines for mixing ratios as well as the methods of application. Carefully measure the components you require and assure that they are thoroughly mixed to complete an even consistency. Use the material for repair in the designated period of time to prevent the material from setting too quickly.

Not Curing Properly

Curing the material allows it to obtain its maximum durability and strength. Improper curing may result in cracks, shrinkage and weakening the bond with the concrete.

How to Avoid It: Keep the area moist during the process of curing. This can be accomplished using plastic sheets, damp burlap or spraying water mist at regular intervals. Check the instructions of the manufacturer to determine the recommended curing duration for the particular material being used.
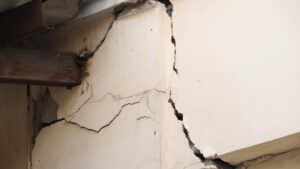
Common Concrete Repair Mistakes and How to Avoid Them

Applying Overcoating Too Soon

While protecting the surface is crucial, sealing the surface, applying paints or sealants too soon could trap moisture within the patch, creating issues later on.

How to Avoid It: Let the repair material completely dry before placing any coats. It typically takes between 24-48 hours, based on the conditions of the weather and the materials employed. Make sure you are ventilated during drying.

Overlooking Expansion Joints

Expansion joints are constructed to let concrete expand and contract as the temperature fluctuations, thus preventing cracking. Inadequately accounting for expansion joints in repairs could result in new cracks developing within the repair area or the concrete surrounding it.

How to Avoid It: If your repair requires expansion joints that are already in place, assure they are properly maintained or replaced in the repair procedure. Repairs that are new may require the use of expansion joints to avoid the possibility of future problems.

DIY Repairs for Extensive Damage

Although some cracks may appear appropriate for DIY repair, the process of tackling large-scale damage requires skillful knowledge. Concrete repair projects that require structural cracks, huge areas of damage or more complex repairs such as slab lifting must be dealt with by skilled concrete repair specialists.

How to Avoid It: For serious concrete damage Do not be afraid to get competent benefit. Professionally trained contractors have the experience, abilities, expertise, and equipment to determine the issue, suggest appropriate options, and then carry out repairs that are in line with industry standards.

Conclusion

Avoiding this common error and observing the correct procedures, you will assure an effective and lasting repairs to concrete (Concrete Repair). If you have many damages or require complex repairs, contacting a well-qualified expert is strongly advised. They have the knowledge as well as the experience and equipment to tackle more complex repairs and warrant the structural integrity of the final result.

CONTACT ZOHA MASONRY TODAY FOR A FREE CONSULTATION

CUSTOMER REVIEWS ON HOMESTARS

Categories
Masonry Services

How to Remove and Replace a Damaged Brick in Your Wall

A damaged brick on your wall could cause eye shaming and possible danger. Chips, cracks or even crumbling could hinder the beauty of your house and, in extreme situations, permit water to enter. The good news is that replacing a damaged brick can be a simple DIY task with the proper tools and experience. This guide will take you through the steps of taking the damaged brick off and putting in a new one to ensure smooth and durable repair.

Before You Begin: Safety and Preparation

Safety is the most important thing to consider when working using the masonry. Here’s the things you’ll need prioritize:

  • Safety Gear: Wear protective glasses gloves as well as a dust mask, to safeguard your hands, eyes and your lungs from debris and dust.
  • Drop Cloth: Spread an untidy cloth in order to collect fallen debris and to protect the area.
  • Work Area: Ensure that you have plenty of space for you to move around comfortably.

Tools and Materials

  • Hammer Drill: Hammer drill crucial for breaking the mortar surrounding the brick that has been damaged.
  • Masonry Drill Bit: Select the masonry drill bit that is compatible with the hammer drill size (typically between 8mm and 10mm).
  • Masonry Chisel: A strong tool can be employed to break the brick damaged and to take away any remaining mortar.
  • Hammer: The hammer can be employed in conjunction with the chisel.
  • Pointing Trowel: Trowel assists apply and smooth the newly applied mortar.
  • Brick Replacement: Choose the right brick replacement that will match the shape and size of your bricks. Take bricks you don’t want from an unnoticed part of your house or buy new bricks at a hardware store.
  • Mortar Mix: Get ready-mixed mortar, or buy dry mortar mix, and follow the instructions of the manufacturer to mix.
  • Level: A level can assure that the brick will be in line with the wall.
  • Joint Tool (Optional): The joint tool is a great way to give a competent appearance to joint joints made of mortar.
  • Damp Rag: A damp rag can be used to wash the area of work.

How to Remove and Replace a Damaged Brick in Your Wall

Assessing the Damage

The extent of the damaged brick’s condition will affect the method you choose to take for its removal. Consider these factors:

  • Minor Cracks: Small hairline cracks may not require replacement. If they’re accompanied by a crumbling process or water infiltration, fix them immediately.
  • Large Cracks or Chips: The damage may compromise an extensive part of the brick or expose the inside walls, repair is required.
  • Loose Brick: It is a brick that moves or is able to move easily demands immediate attention. It could signal structural issues or water damage to the brick.

Removing the Damaged Brick

  • Isolating the Brick: Utilizing your hammer drill and a masonry bit, make several holes around the edges of the brick that is damaged and focusing upon the joints of mortar. Make sure to drill close to the brick that has been damaged in order to limit damage to the adjacent bricks.
  • Breaking Up the Mortar: Take care to chisel off your mortar in between drill holes, gradually weakening holding of the damaged brick.
  • Removing the Brick: When the mortar has broken Use the chisel as well as hammer to take out the damaged brick one by one. Take care to prevent any further damage to the surrounding bricks.
  • Cleaning the Cavity: After the damaged brick has been removed, clean the cavity of remaining mortar particles. Make use of a brush or vacuum to get rid of particles and dust.

Preparing the New Brick and Mortar

  • Matching the Brick: Choose an alternative brick that matches the color, size and texture of the existing bricks. If you’re with an old brick, assure it’s cleaned and free of mortar leftovers.
  • Mixing Mortar: Make up mortar mix compatible to the instructions of the manufacturer. The consistency is similar to a little damp putty.

Installing the New Brick

  • Mortar Application: With your trowel with a pointed tip to put a small layer mortar on the sides and bottom of the hole where the brick to be installed. The mortar should fill the gaps and provide an even foundation.
  • Positioning the Brick: Install the brick into the wall cavity by gently tapping it using the trowel handle to assure the proper placement. Utilize a level to determine whether the brick is flush with the wall. Make any adjustments needed.
  • Tooling the Joints: Once the brick is set and the joint tool is in place, you can use it (or a trowel with a pointing) to give a smooth, smooth and well-qualified look for mortar joints. The style should be similar to the joints that are already on your wall.
  • Cleaning Up: When the mortar remains wet it is recommended to use a rag that is damp to clean any mortar off the brick’s surface and its surrounding areas.

How to Remove and Replace a Damaged Brick in Your Wall

Curing and Finishing Touches

  • Curing the Mortar: Let the mortar fully cure alike with the manufacturers suggested drying time. It typically takes between up to 24 hours, depending on the weather conditions.
  • Protecting the Wall (Optional): If the wall being repaired is exposed to elements, you can apply an impervious sealant that repels water to the mortar joints of the new construction for extra protection.

Additional Tips

  • If you’re working on different broken bricks take care to work on them one by one beginning through the entire process from bottom to top in order to not disturb the bricks below.
  • When you drill and chisel be aware of plumbing or electrical wires which could be concealed within the wall. If you are unsure, ask a competent person to get help.
  • To assure a precise removal of the damaged brick, think about an angle mill equipped with the blade that is masonry. But this will require more ability and skill and you should assess your confidence degree prior to trying this method.
  • If the brick that is damaged is close to a corner the brick may require extra support to support the brick during removal and placement. It is possible to use temporary wooden braces to stop the bricks around it from shifting.

When to Call a Professional

Although replacing damaged bricks is a do-it-yourself task, think about seeking skillful benefit when you encounter the following scenarios:

  • Extensive brick damage: A large portion of your wall has been affected by damaged bricks and well-qualified mason will warrant an effective and sturdy repair.
  • Structural concerns: If your damaged brick is affecting the structural strength of your wall getting in touch with a competent is essential to resolve the root of the issue and prevent any further issues.
  • Lack of confidence: Insecurity feeling uneasy or don’t have the tools and talent to complete the task Don’t be afraid to employ an experienced mason to give you security.

Following these steps and taking into consideration the extra guidelines, you’ll be able to successfully tackle the task of fixing a damaged brick on your wall. Make sure you are safe and don’t be afraid to seek skillful benefits when you need it. A well-maintained brick wall will not only improve the appearance of your house, but will also guarantee its strength for many years to come.

CONTACT ZOHA MASONRY TODAY FOR A FREE CONSULTATION

CUSTOMER REVIEWS ON HOMESTARS

Categories
Masonry Services

The Ultimate Guide to Waterproofing Your Basement in Toronto

Toronto’s thriving architecture and culture have a unique issue for homeowners to keep basements dry. Toronto’s weather is unpredictable, marked by extreme winters and heavy rain and flooding, which can cause issues with water intrusion in basements. Basement leaks aren’t only an inconvenience. It can cause major damages to the foundation of your home, cause the growth of mold, and even put a strain on the safety of both your family and home.

This comprehensive guide provides Toronto citizens with necessary knowledge to tackle basement waterproofing in a proactive manner. We’ll look at the indicators of water issues, delve into the various methods of waterproofing (both indoors and outdoors) and guide you through the procedure for water proofing the basement.

Why Waterproofing Matters in Toronto

The basements in Toronto are prone to water infiltration because of many reasons:

  • High water table: The town is in a flat, low-lying region with high water tables. This means that pressure from groundwater can cause water to flow towards the basement’s walls.
  • Clay soil: Clay soil, which is prevalent throughout Toronto keeps water in good condition, which increases the pressure on the foundation walls.
  • Freeze-thaw cycles: Toronto’s fluctuating temperatures can cause water trapped in the soil to freeze and expand, putting stress on foundation walls and potentially causing cracks.
  • Heavy rainfall: Intense downpours can overwhelm drainage systems, leading to water pooling around the foundation and seeping into the basement.

Recognizing the Signs of Water Problems

Early detection is key to preventing extensive damage. Here are some telltale signs your basement needs waterproofing:

  • Visible cracks: Cracks in the foundation of floors, walls or around windows or doors are the entry areas for flooding.
  • Water stains: Stains on walls, floors, or ceilings indicate past or ongoing water leaks.
  • Mold and mildew: Musty odors and visible mold growth are signs of excessive moisture.
  • Efflorescence: A white, crystalline substance on basement walls signifies water migration through concrete.
  • Dampness: Feeling dampness under foot or noticing condensation on walls suggests high humidity levels.

Choosing the Right Waterproofing Method

There are two major methods of water proofing basements both exterior and interior. What is the desirable method for the house is determined by the extent of the problem and the foundation type and the budget you have set.

Interior Waterproofing

Interior waterproofing techniques deal with water leaks coming from within the basement. They’re typically less costly as external options, however they might not be appropriate for every situation. If so, here are some of the most common ways to do this:

  • Waterproofing membranes: A leak proof membrane, similar to rubberized asphalt or plastic sheeting can be applied to the basement’s walls and the bottom to create a fence from humidity.
  • Drain systems: A border drain system gathers water that is oohing through the walls of the foundation and then redirects it to the sump pump. The sump pump then releases the water into the drains into the house.
  • Sealants: Cracks on foundation wall and foundation bottoms could be filled by using the use of hydraulic cement, and epoxy resin injection to benefit further water infiltration.

The Ultimate Guide to Waterproofing Your Basement in Toronto

Exterior Waterproofing

Exterior water proofing methods concentrate on stopping water from getting to the walls of the foundation from the beginning. These techniques are typically more long-lasting and reliable, however they are also more costly. Here are some of the most popular techniques:

  • French drains: A trench containing gravel is constructed around the foundation. The gravel lets water be able to collect and then be able to drain away from the home.
  • Footing drains: A perforated pipe that is installed around the footings on the foundation drains away water prior to it reaches the walls of the foundation.
  • Foundation coatings: A water-resistant coat is sprayed on exterior walls of the foundation to create an impermeable barrier to water.
  • Grading: The soil surrounding the foundation has been sloped away from the home to enable water to drain naturally.

The Waterproofing Process

Here’s a general overview of the waterproofing process for a Toronto basement:

  • Inspection: The skillful waterproofing professional will examine your basement in order to pinpoint the cause and extent of the problem. They will also examine your foundation’s condition and suggest which is the best appropriate waterproofing process.
  • Preparation: Based on the selected method, this could require excavation to the area around foundations, removal of the waterproofing material and preparing the basement’s floor and walls.
  • Waterproofing installation: The water proofing solution is put in place compatible to the industry standard.
  • Backfilling (exterior methods): After waterproofing for exterior use is finished the area that was excavated around the foundation is then backfilled with drainage material that is appropriate.
  • Clean-up: The working area is meticulously cleaned and areas that have been damaged are cleaned up.

Additional Considerations for Toronto Basements

  • Local building codes: Ensure that your waterproofing technique is compliant with Toronto’s building code.
  • Permits: Based on the size of the project, you might require permission to build at the municipal level.
  • Winterization: If work to waterproof is completed in the winter months, assure proper measures are implemented to protect foundations exposed from the freezing cold temperatures.

DIY vs. Professional Waterproofing

Although some of the tasks involved in waterproofing your interior like patching small cracks, may be done as DIY projects, tackling the most serious water issues within a Toronto basement is excellent done by professionals. Here’s why:

  • Expertise: Professional waterproofing contractors have the expertise and knowledge to identify the cause of leaks in the water and recommend the most effective method of solving it.
  • Proper Techniques: Correctly applied materials correctly is vital to long-term performance. Professionals assure the proper application techniques and adhere to construction guidelines.
  • Safety: Exterior waterproofing typically involves excavation and work around foundations. Professionals have the required safety equipment and are trained to reduce the risks.
  • Guarantees: Trustworthy water proofing firms provide warranties on their work. This gives security and recourse in the event there are any issues in the future.

The Ultimate Guide to Waterproofing Your Basement in Toronto

Finding a Qualified Waterproofing Contractor in Toronto

With a variety of waterproofing companies working in Toronto, finding the right one is crucial. Here are some guidelines to benefit you find a professional:

  • Get recommendations: Ask your friends, relatives, friends, or neighbours for recommendations on trustworthy waterproofing companies they’ve dealt with.
  • Check online reviews: Look for businesses with good reviews on sites like Google My Business or the Better Business Bureau (BBB).
  • Get multiple quotes: Get estimates from several companies that offer water proofing to compare costs and the services provided.
  • Ask questions: During the consultations make sure to ask specific questions regarding experience, options, warranty, as well as insurance coverage.
  • Check credentials: Make sure the business is insured and licensed and that employees are certified to work on waterproofing projects.

Maintaining a Dry Basement

Once your basement has been sealed, regular maintenance is essential to avoid the possibility of problems in the future:

  • Regular inspections: Check your basement’s floors, walls as well as the areas around doors and windows to look for cracks or leaks.
  • Downspout maintenance: Ensure that downspouts are correctly positioned far sufficient from foundation, and redirect water away from your home.
  • Grading maintenance: Ensure proper grading of the base of your house to warrant the water is able to drain away from the home.
  • Dehumidification: Reduce the humidity of your basement with dehumidifiers in order to avoid the growth of mold.

Conclusion

Dry basements are healthy. With the benefit of the tips and advice in this extensive article, Toronto homeowners can efficiently solve the basement waterproofing issue. Be aware that prompt detection as well as competent intervention are essential to the most effective and durable solution, ensuring the safety of your home from damage and creating the most secure and safe living space.

CONTACT ZOHA MASONRY TODAY FOR A FREE CONSULTATION

CUSTOMER REVIEWS ON HOMESTARS