Categories
Masonry Services

8 Common Concrete Repair Mistakes and How to Avoid Them

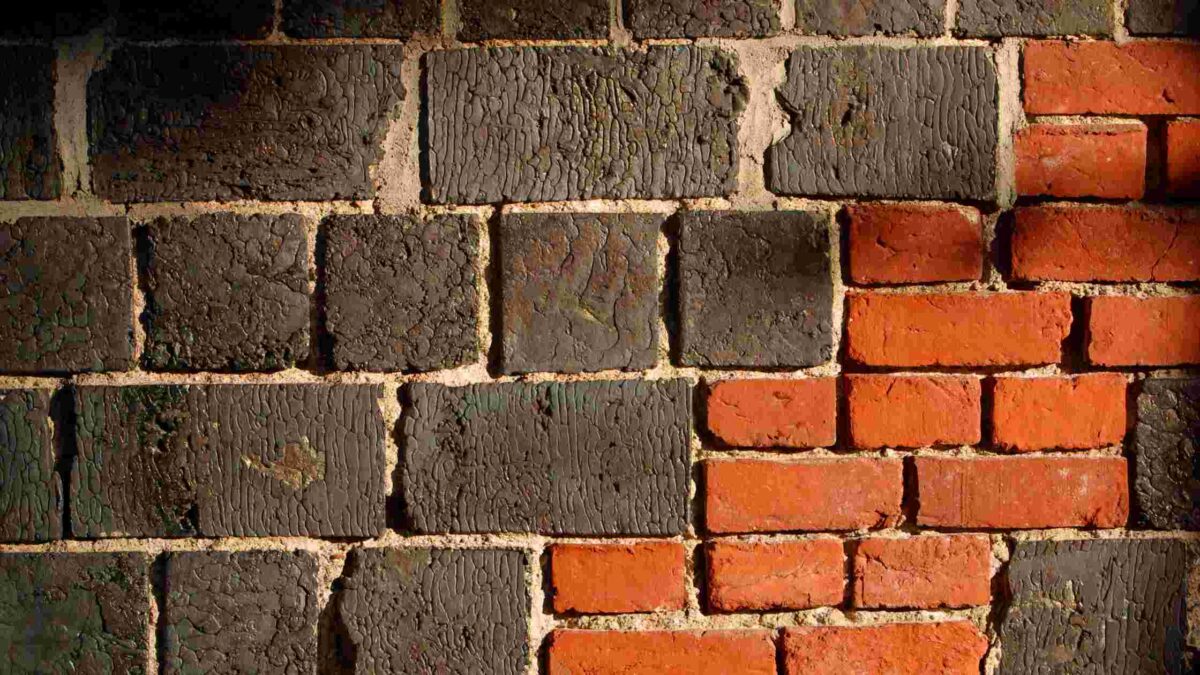
Concrete is a highly robust material that forms the basis of numerous structures across the globe. Like any building material, concrete may form cracks, spalling and other indications of wear and wear and tear. If this occurs, prompt and correct concrete repair is vital to ensure the integrity of the structure and to prevent further damage.

But, DIY concrete repair attempts or hiring contractors with no experience could result in costly errors. In this article, we’ll look at eight common mistakes made in concrete repair and ways to avoid them, which will ensure the longevity of your repair and a successful outcome:

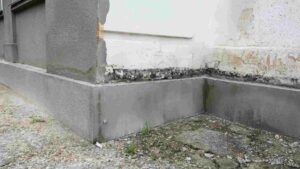
Ignoring the Root Cause of Damage

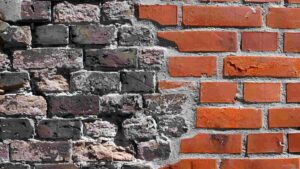
A lot of homeowners are quick to start repair of cracks without considering the root cause. Cracks may be caused by a variety of issues such as foundation shrinkage, settlement, or incorrect curing. In the absence of the cause, it leads to a temporary fix, but cracks could reappear.

How to Avoid It: Before you begin any concrete repair determine the cause of the problem. Contact a structural engineer to identify the issue and suggest suitable solutions. The root cause of the issue can be addressed to ensure an effective fix that will strengthen the whole structure.

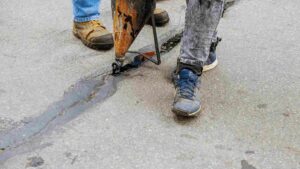
Inadequate Surface Preparation

Filling in cracks isn’t enough. The most important step in concrete repair is to properly prepare the surface. This means removing any dirt, loose debris and patching materials that are already in place. Also, you can make use of an electric or a scarifies to roughen up the surface, giving a better bond to the patch material.

How to Avoid It: Make sure to thoroughly clean the area using water and a hard brush. For grease or oil staining you should use degreasers created for concrete. The surface should be textured to the depth of one-quarter millimeter together with an electric brush or grinder or scarifier. This will create a smooth surface which enables the material used to repair it mechanically join with the concrete.

Common Concrete Repair Mistakes and How to Avoid Them

Using the Wrong Repair Material

There is no universal solution to concrete repair. Different kinds of damage require different repairs materials. A material that is not appropriate for repair can cause the patch to become weaker and could cause premature failure.

How to Avoid It: Find out about different repair options such as epoxy grouts, hydraulic cements or polymers. Select a product depending on the depth, size, and the location of the crack in addition to the weather conditions. ForĀ surface cracks that aren’t too severe simply patching the crack could be sufficient. For structural cracks that are more extensive grout with a high strength could be required. A consultation with an skillful can benefit you choose the best material for the task.

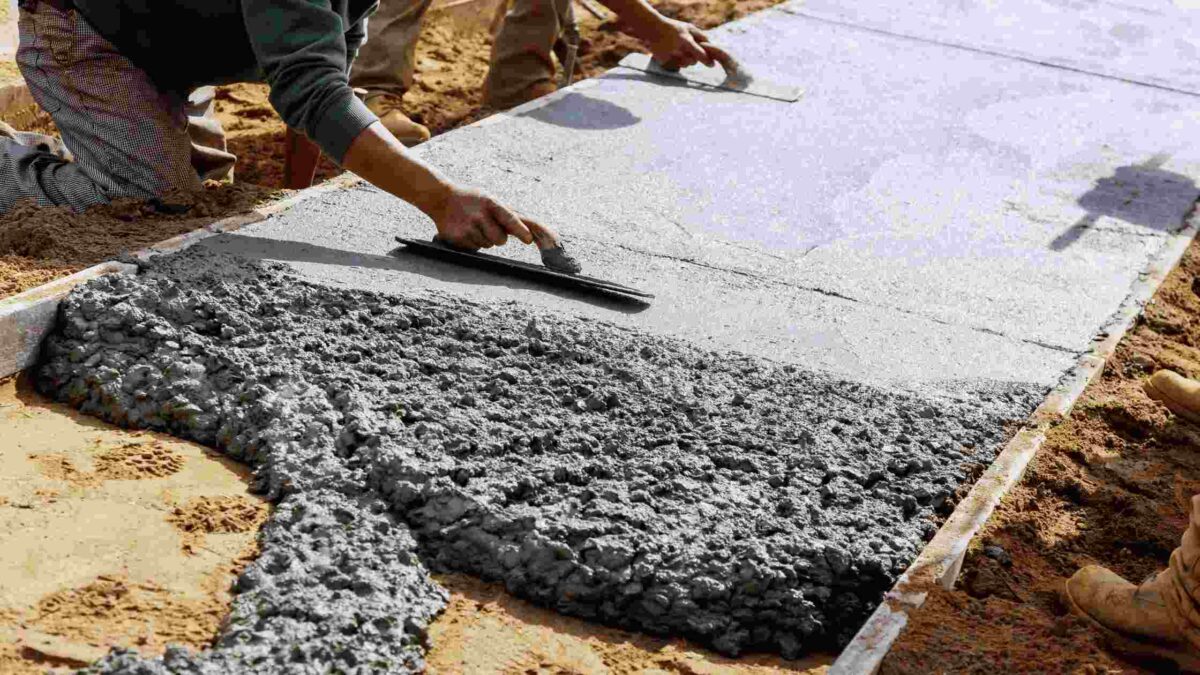
Improper Mixing and Application

Concrete repair products are typically provided in specific ratios of mixing as well as instructions for application. Abiding by these directions could affect the strength and adhesiveness that the patches provide.

How to Avoid It: Always follow the manufacturer’s guidelines for mixing ratios as well as the methods of application. Carefully measure the components you require and assure that they are thoroughly mixed to complete an even consistency. Use the material for repair in the designated period of time to prevent the material from setting too quickly.

Not Curing Properly

Curing the material allows it to obtain its maximum durability and strength. Improper curing may result in cracks, shrinkage and weakening the bond with the concrete.

How to Avoid It: Keep the area moist during the process of curing. This can be accomplished using plastic sheets, damp burlap or spraying water mist at regular intervals. Check the instructions of the manufacturer to determine the recommended curing duration for the particular material being used.

Common Concrete Repair Mistakes and How to Avoid Them

Applying Overcoating Too Soon

While protecting the surface is crucial, sealing the surface, applying paints or sealants too soon could trap moisture within the patch, creating issues later on.

How to Avoid It: Let the repair material completely dry before placing any coats. It typically takes between 24-48 hours, based on the conditions of the weather and the materials employed. Make sure you are ventilated during drying.

Overlooking Expansion Joints

Expansion joints are constructed to let concrete expand and contract as the temperature fluctuations, thus preventing cracking. Inadequately accounting for expansion joints in repairs could result in new cracks developing within the repair area or the concrete surrounding it.

How to Avoid It: If your repair requires expansion joints that are already in place, assure they are properly maintained or replaced in the repair procedure. Repairs that are new may require the use of expansion joints to avoid the possibility of future problems.

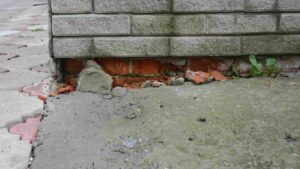
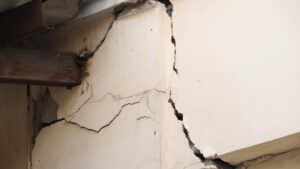
DIY Repairs for Extensive Damage

Although some cracks may appear appropriate for DIY repair, the process of tackling large-scale damage requires skillful knowledge. Concrete repair projects that require structural cracks, huge areas of damage or more complex repairs such as slab lifting must be dealt with by skilled concrete repair specialists.

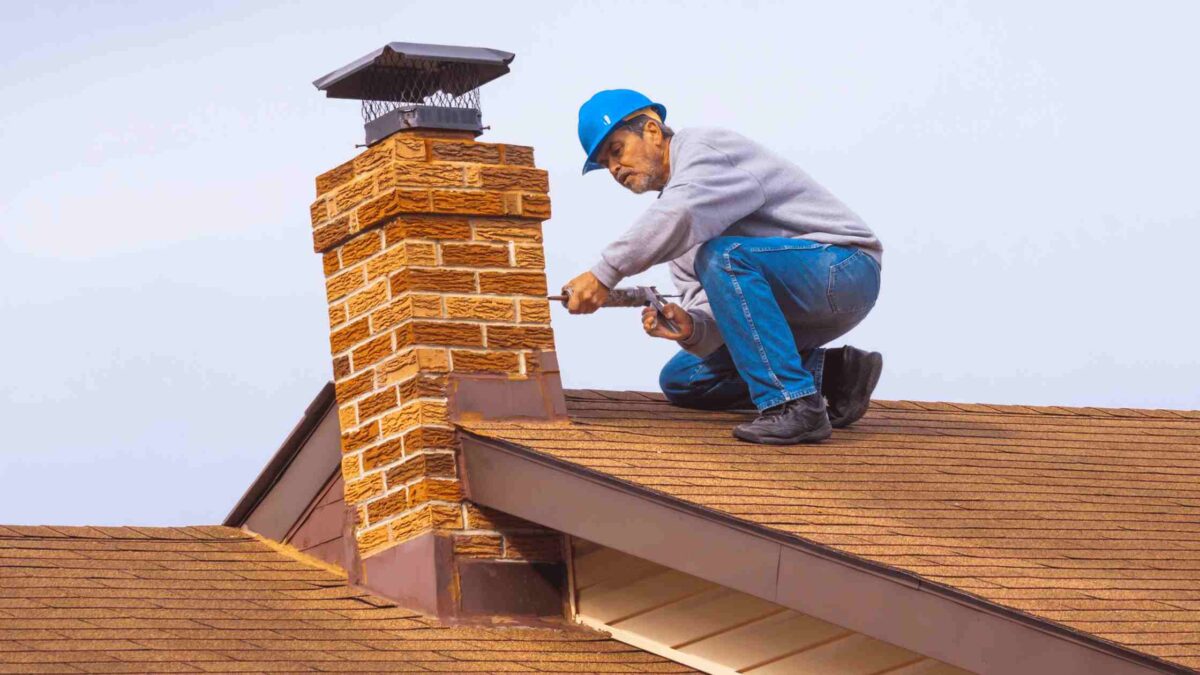
How to Avoid It: For serious concrete damage Do not be afraid to get competent benefit. Professionally trained contractors have the experience, abilities, expertise, and equipment to determine the issue, suggest appropriate options, and then carry out repairs that are in line with industry standards.

Conclusion

Avoiding this common error and observing the correct procedures, you will assure an effective and lasting repairs to concrete (Concrete Repair). If you have many damages or require complex repairs, contacting a well-qualified expert is strongly advised. They have the knowledge as well as the experience and equipment to tackle more complex repairs and warrant the structural integrity of the final result.

CONTACT ZOHA MASONRY TODAY FOR A FREE CONSULTATION

CUSTOMER REVIEWS ON HOMESTARS

Categories
Masonry Services

How to Remove and Replace a Damaged Brick in Your Wall

A damaged brick on your wall could cause eye shaming and possible danger. Chips, cracks or even crumbling could hinder the beauty of your house and, in extreme situations, permit water to enter. The good news is that replacing a damaged brick can be a simple DIY task with the proper tools and experience. This guide will take you through the steps of taking the damaged brick off and putting in a new one to ensure smooth and durable repair.

Before You Begin: Safety and Preparation

Safety is the most important thing to consider when working using the masonry. Here’s the things you’ll need prioritize:

  • Safety Gear: Wear protective glasses gloves as well as a dust mask, to safeguard your hands, eyes and your lungs from debris and dust.
  • Drop Cloth: Spread an untidy cloth in order to collect fallen debris and to protect the area.
  • Work Area: Ensure that you have plenty of space for you to move around comfortably.

Tools and Materials

  • Hammer Drill: Hammer drill crucial for breaking the mortar surrounding the brick that has been damaged.
  • Masonry Drill Bit: Select the masonry drill bit that is compatible with the hammer drill size (typically between 8mm and 10mm).
  • Masonry Chisel: A strong tool can be employed to break the brick damaged and to take away any remaining mortar.
  • Hammer: The hammer can be employed in conjunction with the chisel.
  • Pointing Trowel: Trowel assists apply and smooth the newly applied mortar.
  • Brick Replacement: Choose the right brick replacement that will match the shape and size of your bricks. Take bricks you don’t want from an unnoticed part of your house or buy new bricks at a hardware store.
  • Mortar Mix: Get ready-mixed mortar, or buy dry mortar mix, and follow the instructions of the manufacturer to mix.
  • Level: A level can assure that the brick will be in line with the wall.
  • Joint Tool (Optional): The joint tool is a great way to give a competent appearance to joint joints made of mortar.
  • Damp Rag: A damp rag can be used to wash the area of work.

How to Remove and Replace a Damaged Brick in Your Wall

Assessing the Damage

The extent of the damaged brick’s condition will affect the method you choose to take for its removal. Consider these factors:

  • Minor Cracks: Small hairline cracks may not require replacement. If they’re accompanied by a crumbling process or water infiltration, fix them immediately.
  • Large Cracks or Chips: The damage may compromise an extensive part of the brick or expose the inside walls, repair is required.
  • Loose Brick: It is a brick that moves or is able to move easily demands immediate attention. It could signal structural issues or water damage to the brick.

Removing the Damaged Brick

  • Isolating the Brick: Utilizing your hammer drill and a masonry bit, make several holes around the edges of the brick that is damaged and focusing upon the joints of mortar. Make sure to drill close to the brick that has been damaged in order to limit damage to the adjacent bricks.
  • Breaking Up the Mortar: Take care to chisel off your mortar in between drill holes, gradually weakening holding of the damaged brick.
  • Removing the Brick: When the mortar has broken Use the chisel as well as hammer to take out the damaged brick one by one. Take care to prevent any further damage to the surrounding bricks.
  • Cleaning the Cavity: After the damaged brick has been removed, clean the cavity of remaining mortar particles. Make use of a brush or vacuum to get rid of particles and dust.

Preparing the New Brick and Mortar

  • Matching the Brick: Choose an alternative brick that matches the color, size and texture of the existing bricks. If you’re with an old brick, assure it’s cleaned and free of mortar leftovers.
  • Mixing Mortar: Make up mortar mix compatible to the instructions of the manufacturer. The consistency is similar to a little damp putty.

Installing the New Brick

  • Mortar Application: With your trowel with a pointed tip to put a small layer mortar on the sides and bottom of the hole where the brick to be installed. The mortar should fill the gaps and provide an even foundation.
  • Positioning the Brick: Install the brick into the wall cavity by gently tapping it using the trowel handle to assure the proper placement. Utilize a level to determine whether the brick is flush with the wall. Make any adjustments needed.
  • Tooling the Joints: Once the brick is set and the joint tool is in place, you can use it (or a trowel with a pointing) to give a smooth, smooth and well-qualified look for mortar joints. The style should be similar to the joints that are already on your wall.
  • Cleaning Up: When the mortar remains wet it is recommended to use a rag that is damp to clean any mortar off the brick’s surface and its surrounding areas.

How to Remove and Replace a Damaged Brick in Your Wall

Curing and Finishing Touches

  • Curing the Mortar: Let the mortar fully cure alike with the manufacturers suggested drying time. It typically takes between up to 24 hours, depending on the weather conditions.
  • Protecting the Wall (Optional): If the wall being repaired is exposed to elements, you can apply an impervious sealant that repels water to the mortar joints of the new construction for extra protection.

Additional Tips

  • If you’re working on different broken bricks take care to work on them one by one beginning through the entire process from bottom to top in order to not disturb the bricks below.
  • When you drill and chisel be aware of plumbing or electrical wires which could be concealed within the wall. If you are unsure, ask a competent person to get help.
  • To assure a precise removal of the damaged brick, think about an angle mill equipped with the blade that is masonry. But this will require more ability and skill and you should assess your confidence degree prior to trying this method.
  • If the brick that is damaged is close to a corner the brick may require extra support to support the brick during removal and placement. It is possible to use temporary wooden braces to stop the bricks around it from shifting.

When to Call a Professional

Although replacing damaged bricks is a do-it-yourself task, think about seeking skillful benefit when you encounter the following scenarios:

  • Extensive brick damage: A large portion of your wall has been affected by damaged bricks and well-qualified mason will warrant an effective and sturdy repair.
  • Structural concerns: If your damaged brick is affecting the structural strength of your wall getting in touch with a competent is essential to resolve the root of the issue and prevent any further issues.
  • Lack of confidence: Insecurity feeling uneasy or don’t have the tools and talent to complete the task Don’t be afraid to employ an experienced mason to give you security.

Following these steps and taking into consideration the extra guidelines, you’ll be able to successfully tackle the task of fixing a damaged brick on your wall. Make sure you are safe and don’t be afraid to seek skillful benefits when you need it. A well-maintained brick wall will not only improve the appearance of your house, but will also guarantee its strength for many years to come.

CONTACT ZOHA MASONRY TODAY FOR A FREE CONSULTATION

CUSTOMER REVIEWS ON HOMESTARS

Categories
Masonry Services

How Much Does Chimney Repair and Removal Cost in Toronto

Toronto’s unique skyline is an impressive mix of different styles of architecture, with many featuring the timeless appeal of chimneys. For homeowners, chimneys are more than a gorgeous exterior; they’re an essential component for venting fireplaces and providing adequate ventilation. But time and weather can cause damage to chimneys, which may require repair or removal. This raises the question: what is the cost of chimney repairs and removal costs in Toronto?

This thorough guide explains the various factors that affect the cost of chimney repairs and removal in the Toronto region. We’ll look at the average cost intervals, explore the factors that impact the cost of these projects, and add helpful tips for obtaining the desirable value from your chimney repair project.

Understanding Chimney Repair Costs

The cost of fixing the chimney in Toronto will vary based on a variety of aspects. Here’s a list of most important elements that affect the final price:

  • Extent of Damage: Repairs of minor nature, such as the repointing of mortar joints, are much less expensive when compared to major structural repair or the reconstruction of chimneys in sections. Cracks, missing or loose bricks, and damaged chimney liners are all causes that can greatly rise the cost of repair.
  • Chimney Size and Material: Higher-end chimneys require more scaffolding and other materials which can result in higher prices. The kind of material you use for the construction of your chimney (brick or stone, for instance.) will also impact the cost of repairs.
  • Accessibility: The chimney must be difficult to access, for instance being located on a roof that is steep or being surrounded by densely packed structures, be prepared to be charged more for labor due to the higher degree of difficulty.
  • Permits and Inspections: Chimney repairs usually will require inspections and permits by the city. Be aware of these more costs when you budget your project.
  • Labor Rates: The level of skills and experience of the chimney mason or sweep will impact the cost of labor. If you are seeking quotes for estimates from several contractors it is suggested choose reputable and licensed experts.

Average Costs for Common Chimney Repairs in Toronto

Here’s an overview of the typical costs for regular fireplace repairs that are common in Toronto:

  • Repointing Mortar Joints: $150 – $500 CAD
  • Crown Seal Repair: $300 – $800 CAD
  • Flue Liner Repair: $500 – $2,000 CAD (depending on liner type and extent of damage)
  • Chimney Rebuilding (sections): $600 – $3,000 CAD (depending on size and material)
  • Full Chimney Rebuild: $5,000 – $20,000+ CAD (depending on size, material, and complexity)

Keep in mind that these are only averages. It’s important to get estimates from certified chimney specialists for an accurate estimate of your particular repair requirements.

Warning Signs That Your Chimney Needs Repair

The early detection of chimney issues could save you cash and also avoid dangers to your safety. Here are some of the most common indicators that indicate your chimney may need to be repaired:

  • Cracks in the Chimney Bricks or Mortar: Cracks could allow water to infiltrate and cause structural damage to the chimney .
  • Spalling Bricks: This refers to the flaking or deterioration of bricks, which is often caused by moisture and snap-thaw cycles.
  • Water Leaks: Leaks that occur around the chimney liner could indicate damaged flashing or loose mortar joints or an issue in your stovepipe liner.
  • Rusted Damper: A mute that is gravelly can hinder the proper tailwinds and create the risk of fire.
  • Creosote Buildup: A substantial subcaste made of creosote an emulsion of wood that has been burned is generally ignitable, and poses a greater risk to the chimney’s stackfires.

If you spot some of these alarm indications, don’t hesitate to get in touch with a certified chimney sweep to conduct an inspection.

How Much Does Chimney Repair and Removal Cost in Toronto

The Importance of Regular Chimney Sweeping

Regular chimney sweeping is an essential part of chimney maintenance. Here’s why:

  • Prevents Chimney Fires: Creosote buildup is the most common reason for chimney fires. Regular sweeping eliminates this flammable substance, making it less likely to catch burning.
  • Improves Efficiency: Clean chimneys allow better airflow which boosts the effectiveness of your fireplace and lowers fuel consumption.
  • Extends Chimney Lifespan: Regular maintenance helps keep the chimney from deteriorating structure, thus prolonging its life.
  • Promotes Safety: The chimney sweep is able to detect potential issues with the chimney, like blocked liners or damaged lines that can prevent safe operation of your fireplace.

The National Fire Protection Association (NFPA) suggests having your chimney cleaned at least once per year for fireplaces with wood burning.

Chimney Maintenance Tips

Here are some useful guidelines for homeowners regarding maintaining their chimneys:

  • Never Burn Garbage in Your Fireplace: Garbage releases toxic toxins into your home and harms your chimney’s flue.
  • Burn Only One Fire at a Time: Multiple fires may cause a chimney to overflow its venting capacity.
  • Close the Damper Properly: The damper that is closed will stop drafts even when the fireplace is not being used.
  • Cover the Flue During Off-seasons: Covering the flue can keep snow, rain and other debris from getting into the chimney.
  • Schedule Regular Inspections: Addition to the annual chimney sweeping or having a licensed chimney competent check your chimney at least every 2 to 3 years is suggested.

Considering Chimney Removal

There are many reasons homeowners may consider taking down their chimney. Damage from structural or physical abuse, or a desire to create extra space are all typical reasons. In the case of cleaning chimneys Toronto Here’s an overview of the price aspects:

  • Removal Scope: A part-time removal which leaves the fireplace in good condition is usually less costly than a complete removal that involves removing the entire chimney both inside and outside the home.
  • Accessibility: Like repairs, difficult access could improve the cost of removal.
  • Disposal of Materials: Cost of taking away bricks, mortar and other waste materials should be incorporated into the overall cost of removal.

Average Costs for Chimney Removal in Toronto

Cost of removal for chimneys in Toronto is contingent on a variety of variables, including:

  • Removal Extent: A comprehensive removal that includes both the stack’s exterior and internal components is more expensive than removing just the outside part.
  • Accessibility: A difficult access situation could necessitate extra equipment or workers to be used, which could increase the expense.
  • Roof Patching: The removal of the chimney will require patching the roof’s penetration which adds to the total cost.
  • Interior Remodel: If the removal requires remodeling the fireplace, more costs for drywall flooring, flooring, or even finishing work must be accounted for.

Here’s a general range for chimney removal costs in Toronto:

  • Partial Removal (Exterior Stack Only): $800 to $2,000
  • Full Removal (Including Interior Components): $2,500 to $7,500 or more

How Much Does Chimney Repair and Removal Cost in Toronto

Important Considerations for Chimney Removal

  • Impact on Home Value: Some homeowners view removal as a method for them to acquire the space they need, it’s vital to think about the possible effect on the resale value. Fireplaces remain a popular feature for enough homebuyers.
  • Building Code Compliance: Chimney removal needs permits and conformity to building codes. Check that your contractor is proficient with these rules.

Finding Reputable Chimney Professionals


When looking for chimney experts in Toronto take note of the following guidelines:

  • Look for Certifications: The most reputable chimney sweeps and masons have certifications from organizations such as Chimney Safety Institute of America (CSIA) or the National Fireplace Institute (NFI).
  • Ask for References: Contact former clientele of the well-qualified to gain a better understanding of their work experience and ethics.
  • Get Multiple Quotes: Compare estimates from a variety of qualified professionals prior to making a choice.
  • Check Insurance: Make sure the contractor is covered by liability insurance and workers’ compensation insurance.

The Toronto District Heating & Air Conditioning Contractors Association (TDHACA) is a good resource for finding qualified chimney professionals in the Toronto area.

Getting the Best Value for Your Chimney Project

  • Schedule Inspections: If you think repairs are required be sure to have a professional chimney sweep examine the chimney prior to soliciting quotes. The inspection will benefit to assure that the estimates accurately reflect the required work.
  • Consider the Long-Term: Although minor repairs may appear to be the desirable budget-friendly feature right now, ignoring the need for maintenance can result in larger (and costly) issues down the line.
  • DIY vs. Professional: While minor chimney maintenance tasks could be accomplished by hand, the more extensive repairs and removals should be handled by qualified experts. Safety and compliance with the code are essential.

Essential Considerations for Your Chimney Project

  • Safety First: A well working chimney is essential to ensure adequate ventilation and stopping the accumulation of harmful gases such as carbon monoxide. Routine chimney checks and cleaning is vital to assure safety.
  • Aesthetics: In many homes, chimneys are an important distinctive aspect. If you’re contemplating the possibility of removing or repairing your chimney, consider the impact of aesthetics on your home’s overall style as well as curb appeal.
  • Future Plans: If you are planning to sell your house in the near future, you should consider the effect of chimney repairs or removal on the value of resales. Fireplaces are a popular feature among buyers.

Conclusion

The maintenance of a safe and functioning chimney is a top priority to Toronto homeowners. When you understand the factors that influence the costs of repairing and removing chimneys and the associated costs, you are able to make educated choices. Be sure to get diverse quotes, prioritizing experienced experts, and taking into consideration the long-term effects are important to warrant you getting the desirable price for your chimney renovation project.

CONTACT ZOHA MASONRY TODAY FOR A FREE CONSULTATION

CUSTOMER REVIEWS ON HOMESTARS

Categories
Masonry Services

The Ultimate Guide to Waterproofing Your Basement in Toronto

Toronto’s thriving architecture and culture have a unique issue for homeowners to keep basements dry. Toronto’s weather is unpredictable, marked by extreme winters and heavy rain and flooding, which can cause issues with water intrusion in basements. Basement leaks aren’t only an inconvenience. It can cause major damages to the foundation of your home, cause the growth of mold, and even put a strain on the safety of both your family and home.

This comprehensive guide provides Toronto citizens with necessary knowledge to tackle basement waterproofing in a proactive manner. We’ll look at the indicators of water issues, delve into the various methods of waterproofing (both indoors and outdoors) and guide you through the procedure for water proofing the basement.

Why Waterproofing Matters in Toronto

The basements in Toronto are prone to water infiltration because of many reasons:

  • High water table: The town is in a flat, low-lying region with high water tables. This means that pressure from groundwater can cause water to flow towards the basement’s walls.
  • Clay soil: Clay soil, which is prevalent throughout Toronto keeps water in good condition, which increases the pressure on the foundation walls.
  • Freeze-thaw cycles: Toronto’s fluctuating temperatures can cause water trapped in the soil to freeze and expand, putting stress on foundation walls and potentially causing cracks.
  • Heavy rainfall: Intense downpours can overwhelm drainage systems, leading to water pooling around the foundation and seeping into the basement.

Recognizing the Signs of Water Problems

Early detection is key to preventing extensive damage. Here are some telltale signs your basement needs waterproofing:

  • Visible cracks: Cracks in the foundation of floors, walls or around windows or doors are the entry areas for flooding.
  • Water stains: Stains on walls, floors, or ceilings indicate past or ongoing water leaks.
  • Mold and mildew: Musty odors and visible mold growth are signs of excessive moisture.
  • Efflorescence: A white, crystalline substance on basement walls signifies water migration through concrete.
  • Dampness: Feeling dampness under foot or noticing condensation on walls suggests high humidity levels.

Choosing the Right Waterproofing Method

There are two major methods of water proofing basements both exterior and interior. What is the desirable method for the house is determined by the extent of the problem and the foundation type and the budget you have set.

Interior Waterproofing

Interior waterproofing techniques deal with water leaks coming from within the basement. They’re typically less costly as external options, however they might not be appropriate for every situation. If so, here are some of the most common ways to do this:

  • Waterproofing membranes: A leak proof membrane, similar to rubberized asphalt or plastic sheeting can be applied to the basement’s walls and the bottom to create a fence from humidity.
  • Drain systems: A border drain system gathers water that is oohing through the walls of the foundation and then redirects it to the sump pump. The sump pump then releases the water into the drains into the house.
  • Sealants: Cracks on foundation wall and foundation bottoms could be filled by using the use of hydraulic cement, and epoxy resin injection to benefit further water infiltration.

The Ultimate Guide to Waterproofing Your Basement in Toronto

Exterior Waterproofing

Exterior water proofing methods concentrate on stopping water from getting to the walls of the foundation from the beginning. These techniques are typically more long-lasting and reliable, however they are also more costly. Here are some of the most popular techniques:

  • French drains: A trench containing gravel is constructed around the foundation. The gravel lets water be able to collect and then be able to drain away from the home.
  • Footing drains: A perforated pipe that is installed around the footings on the foundation drains away water prior to it reaches the walls of the foundation.
  • Foundation coatings: A water-resistant coat is sprayed on exterior walls of the foundation to create an impermeable barrier to water.
  • Grading: The soil surrounding the foundation has been sloped away from the home to enable water to drain naturally.

The Waterproofing Process

Here’s a general overview of the waterproofing process for a Toronto basement:

  • Inspection: The skillful waterproofing professional will examine your basement in order to pinpoint the cause and extent of the problem. They will also examine your foundation’s condition and suggest which is the best appropriate waterproofing process.
  • Preparation: Based on the selected method, this could require excavation to the area around foundations, removal of the waterproofing material and preparing the basement’s floor and walls.
  • Waterproofing installation: The water proofing solution is put in place compatible to the industry standard.
  • Backfilling (exterior methods): After waterproofing for exterior use is finished the area that was excavated around the foundation is then backfilled with drainage material that is appropriate.
  • Clean-up: The working area is meticulously cleaned and areas that have been damaged are cleaned up.

Additional Considerations for Toronto Basements

  • Local building codes: Ensure that your waterproofing technique is compliant with Toronto’s building code.
  • Permits: Based on the size of the project, you might require permission to build at the municipal level.
  • Winterization: If work to waterproof is completed in the winter months, assure proper measures are implemented to protect foundations exposed from the freezing cold temperatures.

DIY vs. Professional Waterproofing

Although some of the tasks involved in waterproofing your interior like patching small cracks, may be done as DIY projects, tackling the most serious water issues within a Toronto basement is excellent done by professionals. Here’s why:

  • Expertise: Professional waterproofing contractors have the expertise and knowledge to identify the cause of leaks in the water and recommend the most effective method of solving it.
  • Proper Techniques: Correctly applied materials correctly is vital to long-term performance. Professionals assure the proper application techniques and adhere to construction guidelines.
  • Safety: Exterior waterproofing typically involves excavation and work around foundations. Professionals have the required safety equipment and are trained to reduce the risks.
  • Guarantees: Trustworthy water proofing firms provide warranties on their work. This gives security and recourse in the event there are any issues in the future.

The Ultimate Guide to Waterproofing Your Basement in Toronto

Finding a Qualified Waterproofing Contractor in Toronto

With a variety of waterproofing companies working in Toronto, finding the right one is crucial. Here are some guidelines to benefit you find a professional:

  • Get recommendations: Ask your friends, relatives, friends, or neighbours for recommendations on trustworthy waterproofing companies they’ve dealt with.
  • Check online reviews: Look for businesses with good reviews on sites like Google My Business or the Better Business Bureau (BBB).
  • Get multiple quotes: Get estimates from several companies that offer water proofing to compare costs and the services provided.
  • Ask questions: During the consultations make sure to ask specific questions regarding experience, options, warranty, as well as insurance coverage.
  • Check credentials: Make sure the business is insured and licensed and that employees are certified to work on waterproofing projects.

Maintaining a Dry Basement

Once your basement has been sealed, regular maintenance is essential to avoid the possibility of problems in the future:

  • Regular inspections: Check your basement’s floors, walls as well as the areas around doors and windows to look for cracks or leaks.
  • Downspout maintenance: Ensure that downspouts are correctly positioned far sufficient from foundation, and redirect water away from your home.
  • Grading maintenance: Ensure proper grading of the base of your house to warrant the water is able to drain away from the home.
  • Dehumidification: Reduce the humidity of your basement with dehumidifiers in order to avoid the growth of mold.

Conclusion

Dry basements are healthy. With the benefit of the tips and advice in this extensive article, Toronto homeowners can efficiently solve the basement waterproofing issue. Be aware that prompt detection as well as competent intervention are essential to the most effective and durable solution, ensuring the safety of your home from damage and creating the most secure and safe living space.

CONTACT ZOHA MASONRY TODAY FOR A FREE CONSULTATION

CUSTOMER REVIEWS ON HOMESTARS

Categories
Masonry Services

What is Parging and Why Does Your Home Need It?

The foundation of your home is the silent protector of your home, the invisible support system that holds everything else together. Like any other component of your home, it also requires protection from weather and the effects of the passing of time. This is where the parging process is a must.

What is Parging?

Parging is the act by which you apply a very thin coating of cement-based mortar on the masonry wall, which is typically the house’s foundation. The mortar mix, generally composed of sand, lime, and cement provides a smooth, polished surface. While it can be used for aesthetics, parging has an even more important benefit: it protects your foundation.

Why Does Your Home Need Parging?

There are a variety of reasons why a parging system can be an investment you should consider in your residence:

  • Protection from Water Damage: Water is the biggest threat to foundations. It can penetrate cracks and small imperfections which can cause major damage over the course of time. It acts as a barrier to water that stops water from entering and protecting the structural solidity that your foundation has.
  • Improved Insulation: A laid foundation will add layer of insulation that keeps your home warmer during winter months and cooler in the summer. This could result in lower energy bills as well as more relaxing living conditions.
  • Prevention of Cracks and Erosion: Exposure to the harsh weather elements could cause cracks to form within your foundation. The cracks may expand as time passes allowing water to get in and could lead to structural issues. Parging can prevent cracks from appearing and shield the foundation from the effects of erosion caused by rain and wind.
  • Enhanced Curb Appeal: A slicker curb appeal the look of a concrete foundation exposed isn’t the ideal example of beauty. Parging provides a sleek and polished look that improves the overall look of your house. This is particularly beneficial when you’re thinking of selling your home shortly.
  • Increased Longevity of the Foundation: To protect your foundation from cracks, water damage, and erosion, a parging system can greatly extend the lifespan of your foundation. This means less repairs and less maintenance costs later on.

Signs You Need Parging

Here are some indicators that your foundation might benefit from parging:

  • Visible Cracks: Hairline cracks are a commonly occurring feature of concrete, but more extensive cracks (wider than the size of the width of a dime) may be a sign of foundation issues. Parging may help stop these cracks from becoming worse.
  • Spalling: This refers to the flaking or chipping away of the concrete surface. Spalling is often caused by water infiltration and freeze-thaw cycles. It’s a clear sign that your foundation needs protection.
  • Water Leaks in the Basement: If you’re seeing a boost in water seepage within your basement it could be an indication that water is making its way into cracks in the foundation. Parging may help to solve the issue and prevent further leaks.
  • Uneven Foundation Walls: Foundations should be level and even. If you notice irregularity or bowing in the foundation walls, it’s important to correct the issue before it gets worse. Parging is a part of your solution but it’s essential to talk with a specialist in foundation repair.

What is Parging


Is Parging Right for Your Home?

The decision of whether or not your house requires a septic tank is based on a variety of aspects, such as the condition and age of your foundation as well as the climate you live in, as well as the existence of any issues. Here are a few more factors to consider:

  • New Construction: Parging isn’t essential for foundations being constructed. However, it’s an excellent preventative measure, especially in areas that have extreme winters or large amounts of rain.
  • Existing Homes: In older houses, parking could be a great option to raise the foundation’s function and appearance. If you’re seeing any of the indicators that were mentioned earlier that suggests parging could be an investment worth making.
  • Climate: Houses in regions with cycles of freeze-thaw or heavy rainfall are more benefited by parging over those living in climates that are dry and temperate.

The Parging Process

Parging is a skilled task best left to professionals. Here’s a general overview of the process:

  • Preparation: The wall of the foundation is cleaned thoroughly and any loose debris is eliminated.
  • Surface Texturing: A foundation’s exterior can be made rougher to make a better bond to the mortar.
  • Moisture Control: The foundation wall is humidified to warrant that the mortar is properly adhered to the mortar.
  • Mortar Application: This mortar mix is then sprayed onto the wall of the foundation in two or one coat, based on the thickness desired.
  • Finishing Touches: The parging is smoothed out, and then allowed to set.

Maintaining Your Parged Foundation

A regular maintenance program can prolong the life of your foundation and parging. Here are a few tips:

  • Regular Inspections: Check your foundation walls regularly to check for spalling, cracks, or evidence of water infiltration.
  • Address Issues Promptly: If you spot any problems, don’t hesitate to take care of the issue. A quick intervention can stop small problems from becoming big issues.
  • Proper Drainage: Make sure you have the drainage of your foundation in order to stop water from getting into cracks and pooling. You may want to consider extending downspouts as well as making sure the soil is graded away from your home.
  • Basement Humidity Control: Keep a moderate level of humidity in your basement to avoid the build-up of moisture that can damage the parging. Think about an air dehumidifier in the event of need.

Beyond Parging: Additional Foundation Protection

While parging can be a useful instrument for protecting the foundation, however, it is not the sole option in certain situations. Here are some additional considerations:

  • Foundation Drainage Systems: If you have recurring water issues in your basement, a foundation drainage system might be necessary to redirect water away from the foundation walls.
  • Foundation Crack Repair: For existing cracks in your foundation, specialized techniques are available to repair and reinforce the structure.

Conclusion

Parging is a reliable and inexpensive method of protecting the foundation of your home, boosting its energy efficiency, and increasing its curb appeal. If you are aware of the advantages of a parging system and the indicators that indicate your foundation may require it, you’ll be able to make educated decisions regarding the protection of your most valuable asset, the home you call home. Be sure to speak with a certified foundation repair expert will benefit you and decide on which is the accurate course of action for your particular situation.

Contact Zoha Masonry Today for a Free Consultation

Customer Reviews on Homestars